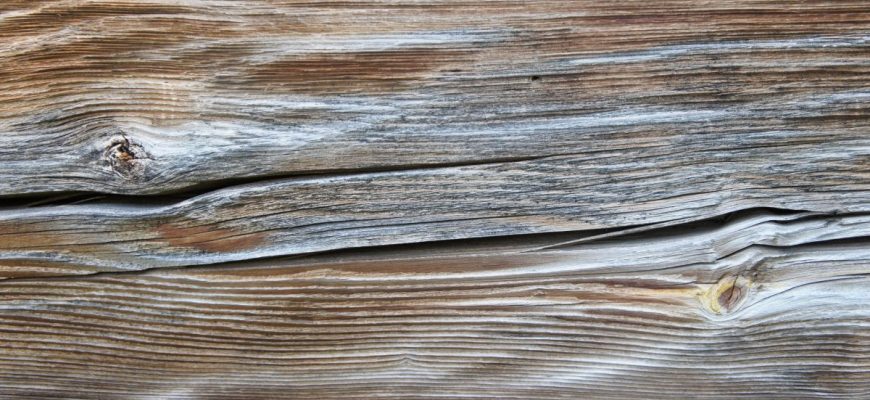
Wood rot is a common problem that occurs when wood is exposed to moisture over time. As moisture seeps into the wood, it provides an environment where fungus can grow, causing the wood fibers to break down and decay. This decay process causes wood to become discolored, softened, and structurally unsound.
There are a few different types of wood rot that can occur:
- Dry rot – Caused by the fungus Serpula lacrymans, dry rot can destroy wood rapidly and is difficult to treat. It produces thread-like strands that allow it to spread across wood and infect other areas.
- Wet rot – Several types of fungus cause wet rot which breaks down the lignin that holds wood fibers together. Wood with wet rot feels spongy and damp.
- White rot – This type of decay is caused by fungus that breaks down lignin and cellulose, leaving the wood a bleached, stringy appearance.
- Brown rot – Fungi that cause brown rot break down cellulose only, leaving the lignin behind. This gives affected wood a brown, crumbly texture.
If left untreated, wood rot will continue to spread and compromise the strength of wooden structural elements. Catching and repairing rot early is important to prevent further costly damage to a home.
- What Causes Wood Rot?
- Identifying Signs of Wood Rot
- Consulting a Specialist
- Preventing Wood Rot
- Eliminating Excess Moisture
- Treating Wood with Fungicides
- Inspecting for Leaks and Ensuring Proper Drainage
- Applying Caulk and Sealant
- Applying Protective Coatings
- Repairing Rotten Wood
- Assessing the Feasibility of Repair
- Necessary Tools for Rotten Wood Repair
- Step-by-Step Repair Process
- Identifying and Removing Infected Areas
- Cleaning and Preparing the Area
- Applying Wood Fillers or Epoxy Resin
- Sanding and Priming
- Painting
- Final Thoughts on Wood Rot Repair
What Causes Wood Rot?
The primary cause of wood rot is moisture. When moisture content in wood exceeds 20%, conditions become ideal for fungus growth. Moisture can come from a variety of sources:
- Rainwater leaks from the roof, gutters, or around windows and doors
- Plumbing leaks
- Flooding
- Condensation and humidity in poorly ventilated crawlspaces or attics
- Moisture in the soil that transfers to wood touching the ground
- Sprinklers spraying wood surfaces
- Wet climates
Certain types of wood are also more prone to rot including cedar, redwood, pine, and fir. Their natural resistance breaks down over time with moisture exposure. Continually wetting wood speeds up fungal growth and decay.
In addition to moisture, wood rot fungi needs oxygen and mild temperatures between 60-90°F to thrive. Dark, humid spaces like attics and crawlspaces surrounded by moist soil provide an optimal environment for rot.
Identifying Signs of Wood Rot
Catching wood rot early is key to simpler and less expensive repairs. Look for these common signs of fungal decay in wood:
- Soft, spongy areas in wood.
- Discoloration – gray, brown, white or black staining.
- Mold or fungus visible on the surface.
- Crumbling, cracked wood.
- Sagging structural beams, floors, or roofs.
- Peeling paint.
- Musty smell.
Probing suspect areas with an awl helps detect hidden decay underneath the surface. Poking softened, damaged sections indicates rot may be spreading deeper into the wood.
Outside signs of rot near wood include standing water, leaks, moisture stains, and excess mildew growth on surrounding surfaces. Tracking down the source of moisture helps diagnose the rot problem.
Consulting a Specialist
In moderate to severe cases of wood rot, consulting a specialist can be extremely helpful. Professional home inspectors, contractors, and structural engineers can:
- Accurately assess the extent of damage.
- Determine if structural integrity is compromised.
- Pinpoint the moisture source.
- Provide experienced repair recommendations.
- Identify any additional issues that may be contributing to moisture problems.
Severe rot often requires replacing large sections of wood, extensive remodeling work, and addressing root causes of moisture issues. Professionals have the best chance of remedy more advanced decay and preventing future rot damage.
Preventing Wood Rot
Once wood rot occurs, the decay process cannot be reversed. However, preventing moisture accumulation helps avoid rot in the first place. Here are some key prevention tips:
Eliminating Excess Moisture
Fix any moisture leaks quickly to keep wood dry. Pay special attention to areas that commonly get wet like roofs, windows, bathrooms, and basements. Improve airflow and ventilation where condensation builds up. Dehumidifiers help regulate humidity.
Treating Wood with Fungicides
Applying EPA-registered fungicide products protects wood from fungal growth. Many fungicides safely seep deep into wood pores to prevent decay. Depending on the product, a single application can defend against rot for up to 5 years.
Inspecting for Leaks and Ensuring Proper Drainage
Routinely check for plumbing leaks, signs of water intrusion, standing water, and excess moisture both inside and outside the home. Ensure downspouts and gutters divert water away from the structure. Slope soil and hardscapes to encourage drainage away from the foundation.
Applying Caulk and Sealant
Sealing cracks, joints, windows, and weatherstripping prevents moisture penetration into the home. Specialty log home chinking fills gaps between logs. Durable caulk and sealants keep water out.
Applying Protective Coatings
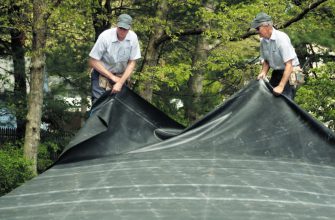
Paint, stains, and wood finishes create a protective barrier shielding exterior wood from moisture damage. Maintain coatings as needed to defend against the elements. Penetrating wood preservatives also help strengthen wood from decay.
Repairing Rotten Wood
In many cases, repairing rotted wood is cheaper and easier than full replacement. As long as structural integrity remains sound, small to moderate sections of decayed wood can be fixed. The key is removing all damaged soft material and sealing up exposed areas to prevent more moisture intrusion.
Assessing the Feasibility of Repair
Consider the size, location, and depth of rotted wood when determining whether repair is practical. Tap wood in suspect areas with a hammer. Solid, firm wood still has good integrity to patch small holes or pits left by removed rotted material. If the rot is widespread or affects structural support beams, extensive replacement is likely needed.
Necessary Tools for Rotten Wood Repair
Rot repair projects require:
- Safety gear – gloves, respirator mask, goggles.
- Pry bar.
- Shovel.
- Hammer.
- Saw.
- Sandpaper.
- Putty knife.
- Wire brush.
- Utility knife.
- Caulk gun.
- Shop vacuum.
- Drop cloths.
- Wood filler, epoxy, or bondo.
- Wood patches and replacement boards.
- Fungicide spray.
- Primer.
- Paint or wood finish.
Step-by-Step Repair Process
Follow these steps to thoroughly repair rot damage:
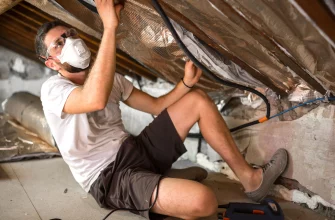
Identifying and Removing Infected Areas
Use a probe, screwdriver or awl to locate soft, punky wood. Outline the area with a marker to define where decay exists. Use a pry bar and hammer to remove all compromised wood down to solid, healthy material. Dig out 2-4 inches beyond visible mold and fungus to help prevent further spread.
Use a shop vacuum to clear away wood debris as you work. Rake a wire brush over exposed wood to scrape off remaining fungus.
Cleaning and Preparing the Area
Wipe down cavity walls with fungicide to kill stubborn spores and prevent recurrence. Let the area dry completely before proceeding. Then brush or blow away dust and debris.
If the rotted section left a through-hole, cut and fit a wood patch piece to the cavity. Choose a durable patch material like pressure-treated lumber. Trace the outline of the hole on the replacement wood and use a jigsaw to cut it to size. Test the fit to ensure it sits flush with the surface when inserted into the hole.
Applying Wood Fillers or Epoxy Resin
For small holes and pits, fill the area with wood filler, Bondo or epoxy resin designed for rot repair. Press the product firmly into the cavity to fill completely and avoid air pockets. Let dry completely. When using wood filler or Bondo, nail or screw wood patches into place as needed to rebuild structural support.
Two-part epoxy resins create a durable fill and help strengthen wood but may shrink over time. Be sure to overfill holes and gouges so the resin can be sanded flush later.
Sanding and Priming
Once fillers fully cure, sand them smooth and blend edges evenly with surrounding wood. Feather out rough edges to help hide seams. Thoroughly vacuum up all sanding dust.
Apply an oil-based wood primer to seal the repair area. Primer helps prevent more moisture from seeping into vulnerable wood exposed by rot damage. Allow to dry completely.
Painting
Finish with 2-3 coats of top-quality exterior paint or protective wood finish. Paint provides an extra moisture barrier. Maintain the finish regularly to prevent future rot issues.
Final Thoughts on Wood Rot Repair
Addressing wood rot promptly saves money over replacing entire sections of damaged wood. As soon as small areas of decay appear, using fungicides and repair techniques keeps deterioration contained. For widespread rot or questions about structural safety, contact a home inspector or engineer.
While fixing rotted window sills, door frames, trim, and exterior wood walls is manageable for DIYers, extensive repairs involving support beams or foundations require professional work. Be sure to remedy the source of moisture intrusion to prevent repeated wood repairs down the road.