Drywall, also known as wallboard or plasterboard, is an essential building material used to construct interior walls and ceilings in homes and buildings. In mobile homes specifically, drywall is relied upon heavily during construction due to its affordability, ease of installation, and ability to create smooth interior finishes.
However, over time, the drywall in a mobile home can become damaged due to factors like moisture, impacts, structural issues, or general wear and tear. Drywall damage in a mobile home can take different forms – from small holes, cracks and dents to large gaps, water damage, or complete panel failure.
Repairing damaged drywall is important for both aesthetic and functional reasons. Visible damage can greatly detract from the visual appeal of a room. More importantly, leaving drywall damage unchecked can lead to bigger problems down the road – further structural damage, pest infestations, mold growth, energy loss, and more.
Thankfully, there are several effective options for repairing drywall damage in mobile homes. This comprehensive guide explores those options – from do-it-yourself techniques to professional services – equipping mobile home owners with the knowledge to tackle drywall repairs properly.
- Importance of Timely and Proper Drywall Repair
- Assessing the Damage
- Identifying Common Causes of Mobile Home Drywall Damage
- Assessing the Extent of the Damage
- Visible Damage
- Hidden Damage
- Structural Integrity
- Repair Options for Mobile Home Drywall
- DIY Repair Techniques
- Patching Small Holes and Cracks
- Repairing Water Damage
- Fixing Large Holes
- Hiring Professional Services
- Hiring a Contractor
- Consulting a Drywall Specialist
- Working with Mobile Home Repair Companies
- Materials and Tools for Mobile Home Drywall Repair
- Essential Materials for DIY Repair
- Tools Required for Effective Repair Projects
- Step-by-Step Guide to Mobile Home Drywall Repair
- Preparation and Safety Measures
- Executing the Repair
- Patching and Filling Holes
- Sanding and Smoothing Surfaces
- Sanding and Smoothing Surfaces
- Priming and Painting
- Preventive Measures and Maintenance
- Regular Maintenance Tips for Mobile Home Drywall
- Final Thoughts on Mobile Home Drywall Repair
Importance of Timely and Proper Drywall Repair
When drywall in a mobile home gets damaged, it’s important to repair it in a timely and proper manner for several reasons:
- Prevent Additional Damage – Unrepaired damage can worsen over time and turn minor issues into major ones. Water damage may cause mold or rotting if left unchecked. Small holes from accidents or wear can expand due to vibration or additional impacts.
- Maintain Structural Integrity – Drywall provides important shear strength and rigidity to walls/ceilings. Significant unrepaired damage compromises those structural qualities, leading to instability, sagging, or collapse.
- Stop Pest/Vermin Entry Points – Gaps and holes in drywall allow easy access for rodents, insects and other pests to get inside walls/ceilings and cause further damage.
- Improve Energy Efficiency – Damaged drywall reduces a home’s insulating qualities, allowing conditioned air to escape and unconditioned air to enter, driving up energy bills.
- Enhance Visual Appeal – Drywall damage is an eyesore. Timely repair restores your walls/ceilings to their original smooth, uniform appearance.
In summary, by promptly repairing any drywall damage in your mobile home, you can prevent bigger problems, maintain structural integrity, block pest entry points, cut energy costs, and keep your home looking its best.
Assessing the Damage
Before attempting to repair drywall damage in your mobile home, it’s important to thoroughly assess the damage. This involves identifying what may have caused the damage, checking both visible and hidden areas for damage, and evaluating whether structural integrity has been compromised.
Identifying Common Causes of Mobile Home Drywall Damage
There are several common causes of drywall damage in mobile homes:
- Moisture – Leaks, flooding, condensation and high humidity can degrade drywall and cause bubbling, discoloration, mold, and more.
- Impacts – Accidents and normal wear-and-tear can put small dents, holes, and cracks in drywall panels.
- Structural Issues – Problems with the wall/ceiling framework, or home shifting off its foundation can stress and warp drywall.
- Pests – Rodents or insects accessing the wall cavity can chew through and severely compromise drywall.
- Faulty Installation – Poor drywall application during home construction can lead panels to fail prematurely.
Identifying the root cause will help determine the best repair approach and preventative measures.
Assessing the Extent of the Damage
Visible Damage
Carefully inspect walls/ceilings with damage to gauge the surface-level severity. Key things to look for:
- Size of cracks, holes, gaps.
- Number/concentration of defects.
- Bubbling/peeling of paint or wallpaper.
- Sagging or warped panels.
- Signs of mold or water staining.
This visible evidence will determine how straightforward or complex repairs may be.
Hidden Damage
After inspecting visible damage, check for potential hidden damage. Methods include:
- Tapping on walls to listen for areas that sound hollow or degraded.
- Poking into gaps/holes to feel for soft, damp, or otherwise compromised drywall behind.
- Using an electrical tester or moisture meter to map out damage.
- Inserting an inspection camera into holes to view cavity damage.
Identifying any concealed damage early allows for more accurate repairs.
Structural Integrity
Assess whether the damaged drywall is still adequately secured to wall/ceiling structure. Indications it may be detached and require fastener remediation:
- Significant sagging or large gaps along seams/edges.
- Drywall feels spongy or detached when pressed.
- Previous improper fastener spacing.
Restoring integrity ensures repairs last. Consulting a structural engineer may be wise for extensive damage.
Repair Options for Mobile Home Drywall
When it comes to repairing damaged drywall in a mobile home, homeowners essentially have two options – Do-It-Yourself (DIY) techniques or hiring professional drywall repair services.
DIY Repair Techniques
With some handyman experience and proper materials, minor to moderate drywall damage can potentially be repaired as a DIY project to save money. Common techniques include:
Patching Small Holes and Cracks
For minor holes and cracks up to a few inches wide, an easy mesh or fiberglass repair patch can be applied using joint compound and drywall tape. After proper drying and sanding, the patches blend right in.
Repairing Water Damage
For drywall damaged by leaks or flooding, the source must first be fixed. Then dried/disinfected panels can be repaired with moisture resistant products. Fans and dehumidifiers help.
Fixing Large Holes
Larger holes may require cutting back affected drywall to solid edges, installing backer boards if needed, then refilling the cavity with filler panels secured by screws and tape before finishing.
Hiring Professional Services
For more extensive drywall damage, or challenging repairs beyond a homeowner’s skill level, hiring drywall repair pros is wise. Professional services include:
Hiring a Contractor
General contractors have experience with all aspects of drywall finishing and repair. They can handle jobs of any scale – from small patch jobs to full panel replacement. Most provide free repair estimates.
Consulting a Drywall Specialist
For tricky drywall issues like water damage or major texture matching, a finishing specialist may better diagnose problems and achieve seamless repairs that DIYers can’t.
Working with Mobile Home Repair Companies
Companies specializing in mobile/manufactured home service understand their unique construction and have expertise repairing problematic OEM drywall materials commonly found in them.
Though professional repair costs more upfront, the high quality results and warranty provided often make it worthwhile for major drywall damage or overambitious DIY projects.
Materials and Tools for Mobile Home Drywall Repair
Having the right materials and tools on hand is key to properly repairing drywall damage in a mobile home.
Essential Materials for DIY Repair
Homeowners undertaking do-it-yourself drywall repairs will need:
- Joint compound – For embedding tape and smoothing seams.
- Drywall tape – Paper or mesh tape to reinforce joints.
- Drywall panels/patches – For replacing large sections.
- Paint – To match existing wall color after repairs.
Other helpful materials include filler panels, wood, fiberglass repair patches, and moisture resistant products for water damage.
Tools Required for Effective Repair Projects
In addition to materials, many tools are required:
- Taping knives – For applying joint compound smoothly.
- Sandpaper/sanding blocks – To sand dried compound evenly.
- Utility knife – For precision cutting of patches and panels.
- Screwdriver – To re-secure loose drywall to framing.
- Mud pan – For holding joint compound while working.
Other useful tools include drills, levels, T-squares, keyhole saws, and more. Having proper equipment makes DIY repairs much simpler.
Step-by-Step Guide to Mobile Home Drywall Repair
Repairing damaged drywall involves careful preparation, precise execution of repair techniques, and some finishing touches. Here is a step-by-step overview:
Preparation and Safety Measures
Crucial first steps include:
- Inspecting damage and planning repair strategy.
- Clearing room of furniture/valuables to access walls.
- Turning off power if working near outlets or wiring.
- Using protective gear like gloves, goggles and mask.
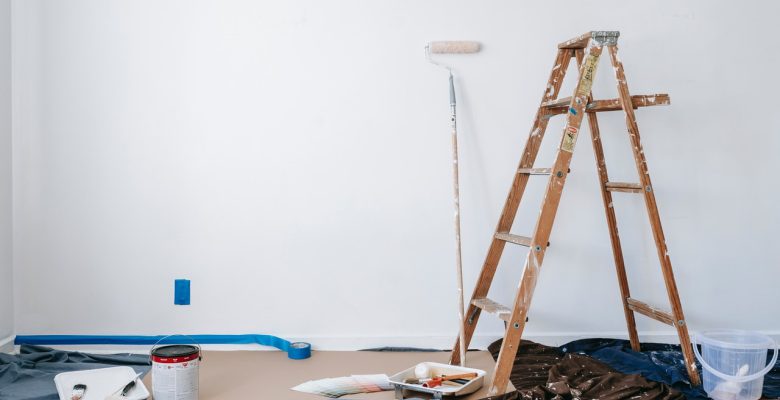
- Covering floors/furniture with drop cloths.
Proper prep prevents accidents and allows for efficient, seamless repairs.
Executing the Repair
Key repair techniques like hole patching, panel replacement, concealment of seams/joints, and rebuilding of damaged areas follow. It takes precision, patience and proper materials.
Patching and Filling Holes
After squaring off holes and gaps, apply mesh/fiberglass tape and joint compound to fill. Allow thorough drying time between thin coats.
Sanding and Smoothing Surfaces
Once patching materials have dried, carefully sand down high spots and uneven areas to create a uniform
Sanding and Smoothing Surfaces
Once patching materials have dried, carefully sand down high spots and uneven areas to create a uniform surface. Use sanding blocks and light pressure to avoid lowering edges.
Priming and Painting
Before the final paint finish, apply drywall primer which helps paint adhere and prevents absorption irregularities. Allow to dry completely, then apply two finish paint coats, allowing proper drying time between coats.
Preventive Measures and Maintenance
To help avoid future drywall damage after repairs, homeowners can take preventive actions like:
- Sealing penetrations with caulk to stop air/moisture intrusion.
- Installing leak detection devices to catch water damage early.
- Avoiding hanging heavy items on wallboard to prevent cracks.
- Controlling indoor humidity levels through ventilation.
Regular Maintenance Tips for Mobile Home Drywall
It also helps to periodically:
- Inspect walls/ceilings for new cracks or damage.
- Repair minor issues promptly before they expand.
- Re-anchor loose drywall panels to framing.
- Watch for plumbing leaks, moisture signs and make needed fixes.
With vigilant maintenance and damage prevention, costly major drywall repairs become less likely.
Final Thoughts on Mobile Home Drywall Repair
Repairing damaged drywall is critical for both aesthetic and functional reasons in any home, including mobile homes. Thankfully there are several effective options – from convenient DIY fixes, to professional solutions for more dramatic damage.
The key is properly evaluating the underlying cause and full extent of the damage before attempting repairs. Armed with the right materials, tools and repair knowledge, mobile home owners can tackle many drywall issues themselves and save significant money.
For challenging, large scale, or complex drywall damage situations, hiring professional repair services is money well spent. And combining repairs with preventive maintenance helps avoid recurring issues in the future.
With some effort and diligence, maintaining and repairing drywall can help mobile homeowners preserve the integrity of their homes for years to come. This guide covers all the core aspects – assessment, repair techniques both DIY and professional, materials/tools, step-by-step repair processes, prevention and maintenance. Equipped with this knowledge, mobile home owners can confidently address drywall damage issues quickly and comprehensively.

