Replacing your existing shower head with a new one can completely transform your shower experience. The right shower head can provide increased water pressure, more efficient water usage, an invigorating massage effect, and an updated, sleek look to your bathroom.
In this comprehensive guide, we will explore the factors to consider when selecting a new shower head, the different types available on the market, must-have features to look for, proper installation techniques, maintenance tips, and additional considerations to create your dream shower.
- Importance of a Quality Shower Head
- Factors to Consider When Choosing a New Shower Head
- Water Pressure and Flow Rate
- Spray Patterns and Adjustability
- Material and Durability
- Ease of Installation and Maintenance
- Types of Shower Heads
- Fixed Shower Heads
- Advantages and Disadvantages
- Handheld Shower Heads
- Advantages and Disadvantages
- Rainfall Shower Heads
- Advantages and Disadvantages
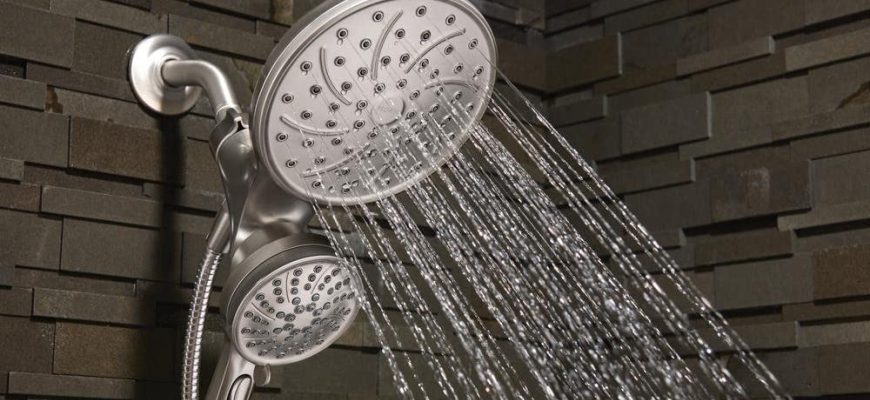
- High-Pressure Shower Heads
- Advantages and Disadvantages
- Features to Look for in a New Shower Head
- Water Conservation Settings
- Self-Cleaning Mechanisms
- Luxury Finishes
- Easy Tool-Free Installation
- Installation Process
- Preparing for Installation
- Removing the Old Shower Head
- Installing the New Shower Head
- Testing and Adjusting
- Additional Considerations
- Water Conservation and Efficiency
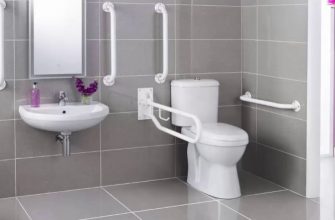
- Compatibility with Existing Plumbing
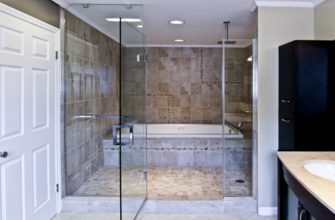
- Aesthetics and Style
- Maintenance and Cleaning Tips
- Preventing Limescale Buildup
- Cleaning and Maintaining Different Types of Shower Heads
- Conclusion
Importance of a Quality Shower Head
A high quality shower head offers numerous benefits beyond just looking nice. The key advantages include:
- Improved water pressure for a more satisfying shower.
- Water conservation features to help reduce usage and save on bills.
- Customizable spray patterns to suit different needs.
- Easy cleaning and maintenance to prevent mineral buildup.
- Durability from quality construction that lasts for years.
- Stylish designs to enhance the look of any bathroom.
With so many perks, it’s easy to see why upgrading your shower head is a smart investment. The right model can leave you feeling invigorated, relaxed, and happy to start each day.
Factors to Consider When Choosing a New Shower Head
Selecting a shower head involves weighing a variety of factors to find the best option for your needs. Key considerations include:
Water Pressure and Flow Rate
Look for a shower head that offers at least 2.0-2.5 gallons per minute flow rate if good water pressure is important to you. This ensures a steady, drenching spray.
Spray Patterns and Adjustability
Consider shower heads with multiple settings like full spray, pulsating massage, and gentle rain. Adjustable angle heads are also useful for targeting the water stream.
Material and Durability
Pick shower heads made of quality metals like brushed nickel, chrome, bronze, or stainless steel for maximum longevity and corrosion resistance.
Ease of Installation and Maintenance
Seeking self-cleaning shower heads with rub-clean jets and filter screens can save you time on upkeep. Tool-free installation options are also available.
Types of Shower Heads
When selecting a shower head, you’ll encounter a few main design styles. The most popular options include:
Fixed Shower Heads
Advantages and Disadvantages
Pros:
- Typically offer wide, drenching spray coverage.
- Often equipped with multiple settings.
- Provide consistent directional water flow.
Cons:
- Lack adjustability in angle or height.
- Can limit mobility in small showers.
Handheld Shower Heads
Advantages and Disadvantages
Pros:
- Highly adjustable and easy to manipulate.
- Enable targeted spraying on specific body parts.
- Great for bathing kids or pets.
Cons:
- Require one hand to hold, limiting activity.
- Prone to dropping which can damage connections.
- May need separate wall mount for convenience.
Rainfall Shower Heads
Advantages and Disadvantages
Pros:
- Provide relaxing, spa-like experience.
- Wide diameter enables full body coverage.
- Great for tall people due to expanded spray area.
Cons:
- Typically fixed install limits adjustability.
- Not well-suited for low water pressure.
- Installation may require extensive plumbing modifications.
High-Pressure Shower Heads
Advantages and Disadvantages
Pros:
- Provide an invigorating, spa-like experience.
- Extra force helps rinse out shampoo quickly.
- Great for sore muscles or boosting alertness.
Cons:
- Use more water than standard models.
- Require minimum water pressure to function properly.
- Can be noisy depending on pump type.
Features to Look for in a New Shower Head
Beyond the overall style and design, shower heads incorporate a variety of features to enhance the experience. Ideal attributes to seek out include:
Water Conservation Settings
Many shower heads offer low-flow or pause settings to cut water usage, which helps lower bills. Look for EPA WaterSense-certified models.
Self-Cleaning Mechanisms
Rub-clean jets, filter screens, and mineral-resistant finishes simplify maintenance by preventing lime and calcium buildup.
Luxury Finishes
Select from polished chrome, brushed nickel, oil-rubbed bronze, or sleek matte black finishes to match your bathroom decor.
Easy Tool-Free Installation
Shower heads with quick connect adapters, slip-on mounting, or adjustable angle brackets enable fast DIY upgrades without a plumber.
Installation Process
Putting in a new shower head is a relatively straightforward project most homeowners can tackle in less than an hour with some simple preparation and the right techniques.
Preparing for Installation
Start by clearing clutter around the shower area and laying down towels to catch drips. Turn off the water supply and verify it’s off. Have your tools and new shower head ready to go before starting.
Removing the Old Shower Head
Use a wrench or pliers to loosen the connection collar at the base of the existing shower head until you can unscrew it by hand. Place a small bucket underneath to catch any remaining water.
Installing the New Shower Head
Wrap plumber’s tape around the shower arm threads then hand tighten on your new shower head. Be careful not to over tighten
or you may damage the connections. For slip-on models, simply push into place until firmly seated on the arm.
Testing and Adjusting
Turn the water back on and check for leaks. Adjust any angles, tighten connections if needed, and test out the spray settings. Refer to manufacturer instructions for additional details.
Additional Considerations
Along with the primary factors covered already, a few other aspects are helpful to think over when selecting your ideal shower head upgrade.
Water Conservation and Efficiency
To save water and money on bills, look for EPA WaterSense rated shower heads that use no more than 2.0 gallons per minute. Low-flow designs still provide great pressure.
Compatibility with Existing Plumbing
Measure your current shower arm length and diameter to ensure a proper fit. Seek universal mount designs if you are unsure of compatibility.
Aesthetics and Style
Choose finishes and designs like rainfall heads that match your bathroom decor. Coordinate with faucets and accessories for a cohesive look.
Maintenance and Cleaning Tips
With occasional cleaning and care, your new shower head will stay looking fresh and work like new for years to come.
Preventing Limescale Buildup
Wipe shower heads clean after each use and regularly soak in a vinegar solution to prevent mineral deposits. Also consider installing a water softener.
Cleaning and Maintaining Different Types of Shower Heads
Refer to manufacturer guidelines for specific models. Generally, wipe down exterior surfaces with non-abrasive cleaners and use toothpicks or pipe cleaners to clear clogged spray jets as needed.
Conclusion
Upgrading to a new shower head is an easy and affordable way to improve your bathing experience. Carefully consider the spray performance, features, installation requirements, and style options before selecting the ideal model for your home and budget. With proper maintenance, your new fixture will provide reliable relaxation and rejuvenation for years to come.